RSS Feed

Tag Archives: recipe

Creamy Cauliflower Fennel Soup Recipe

Quick and Easy Velvety Vegetable Soup

Cauliflower soup with fennel adds depth to this dinner. Photo by Christine Willmsen

Cauliflower soup with fennel adds depth to this dinner. Photo by Christine Willmsen

This is a healthy, yet rich tasting soup that takes minutes to cook and has only a couple of ingredients. We often crave something hot and filling during these cold nights, so this soup hits the spot. Cauliflower is a powerful vegetable known for its vitamin C and K. I added fennel to the soup for a twist that gives a hint of licorice flavor. To ensure any soup maintains a flawless white color, use white pepper. This will make two bowls of soup, because we always want seconds when it’s this good.

You’ll be shocked there’s no butter or cream in this decadent dinner when you taste it. Enjoy it with a glass of Sauvignon Blanc.

Hot in the Kitchen – Cauliflower Fennel Soup

Ingredients:cauiflower

3 tablespoons of olive oil

1 small head of cauliflower cut into large chunks

1/2 cup chicken broth or water

3 green onions chopped

1 teaspoon white pepperfennel

1 teaspoon salt

1 teaspoon garlic paste

1/2 cup sliced fennel or half of a fennel bulb with center core removed

1/4 cup whole milk

1 teaspoon finely chopped fresh or dried chives

cook
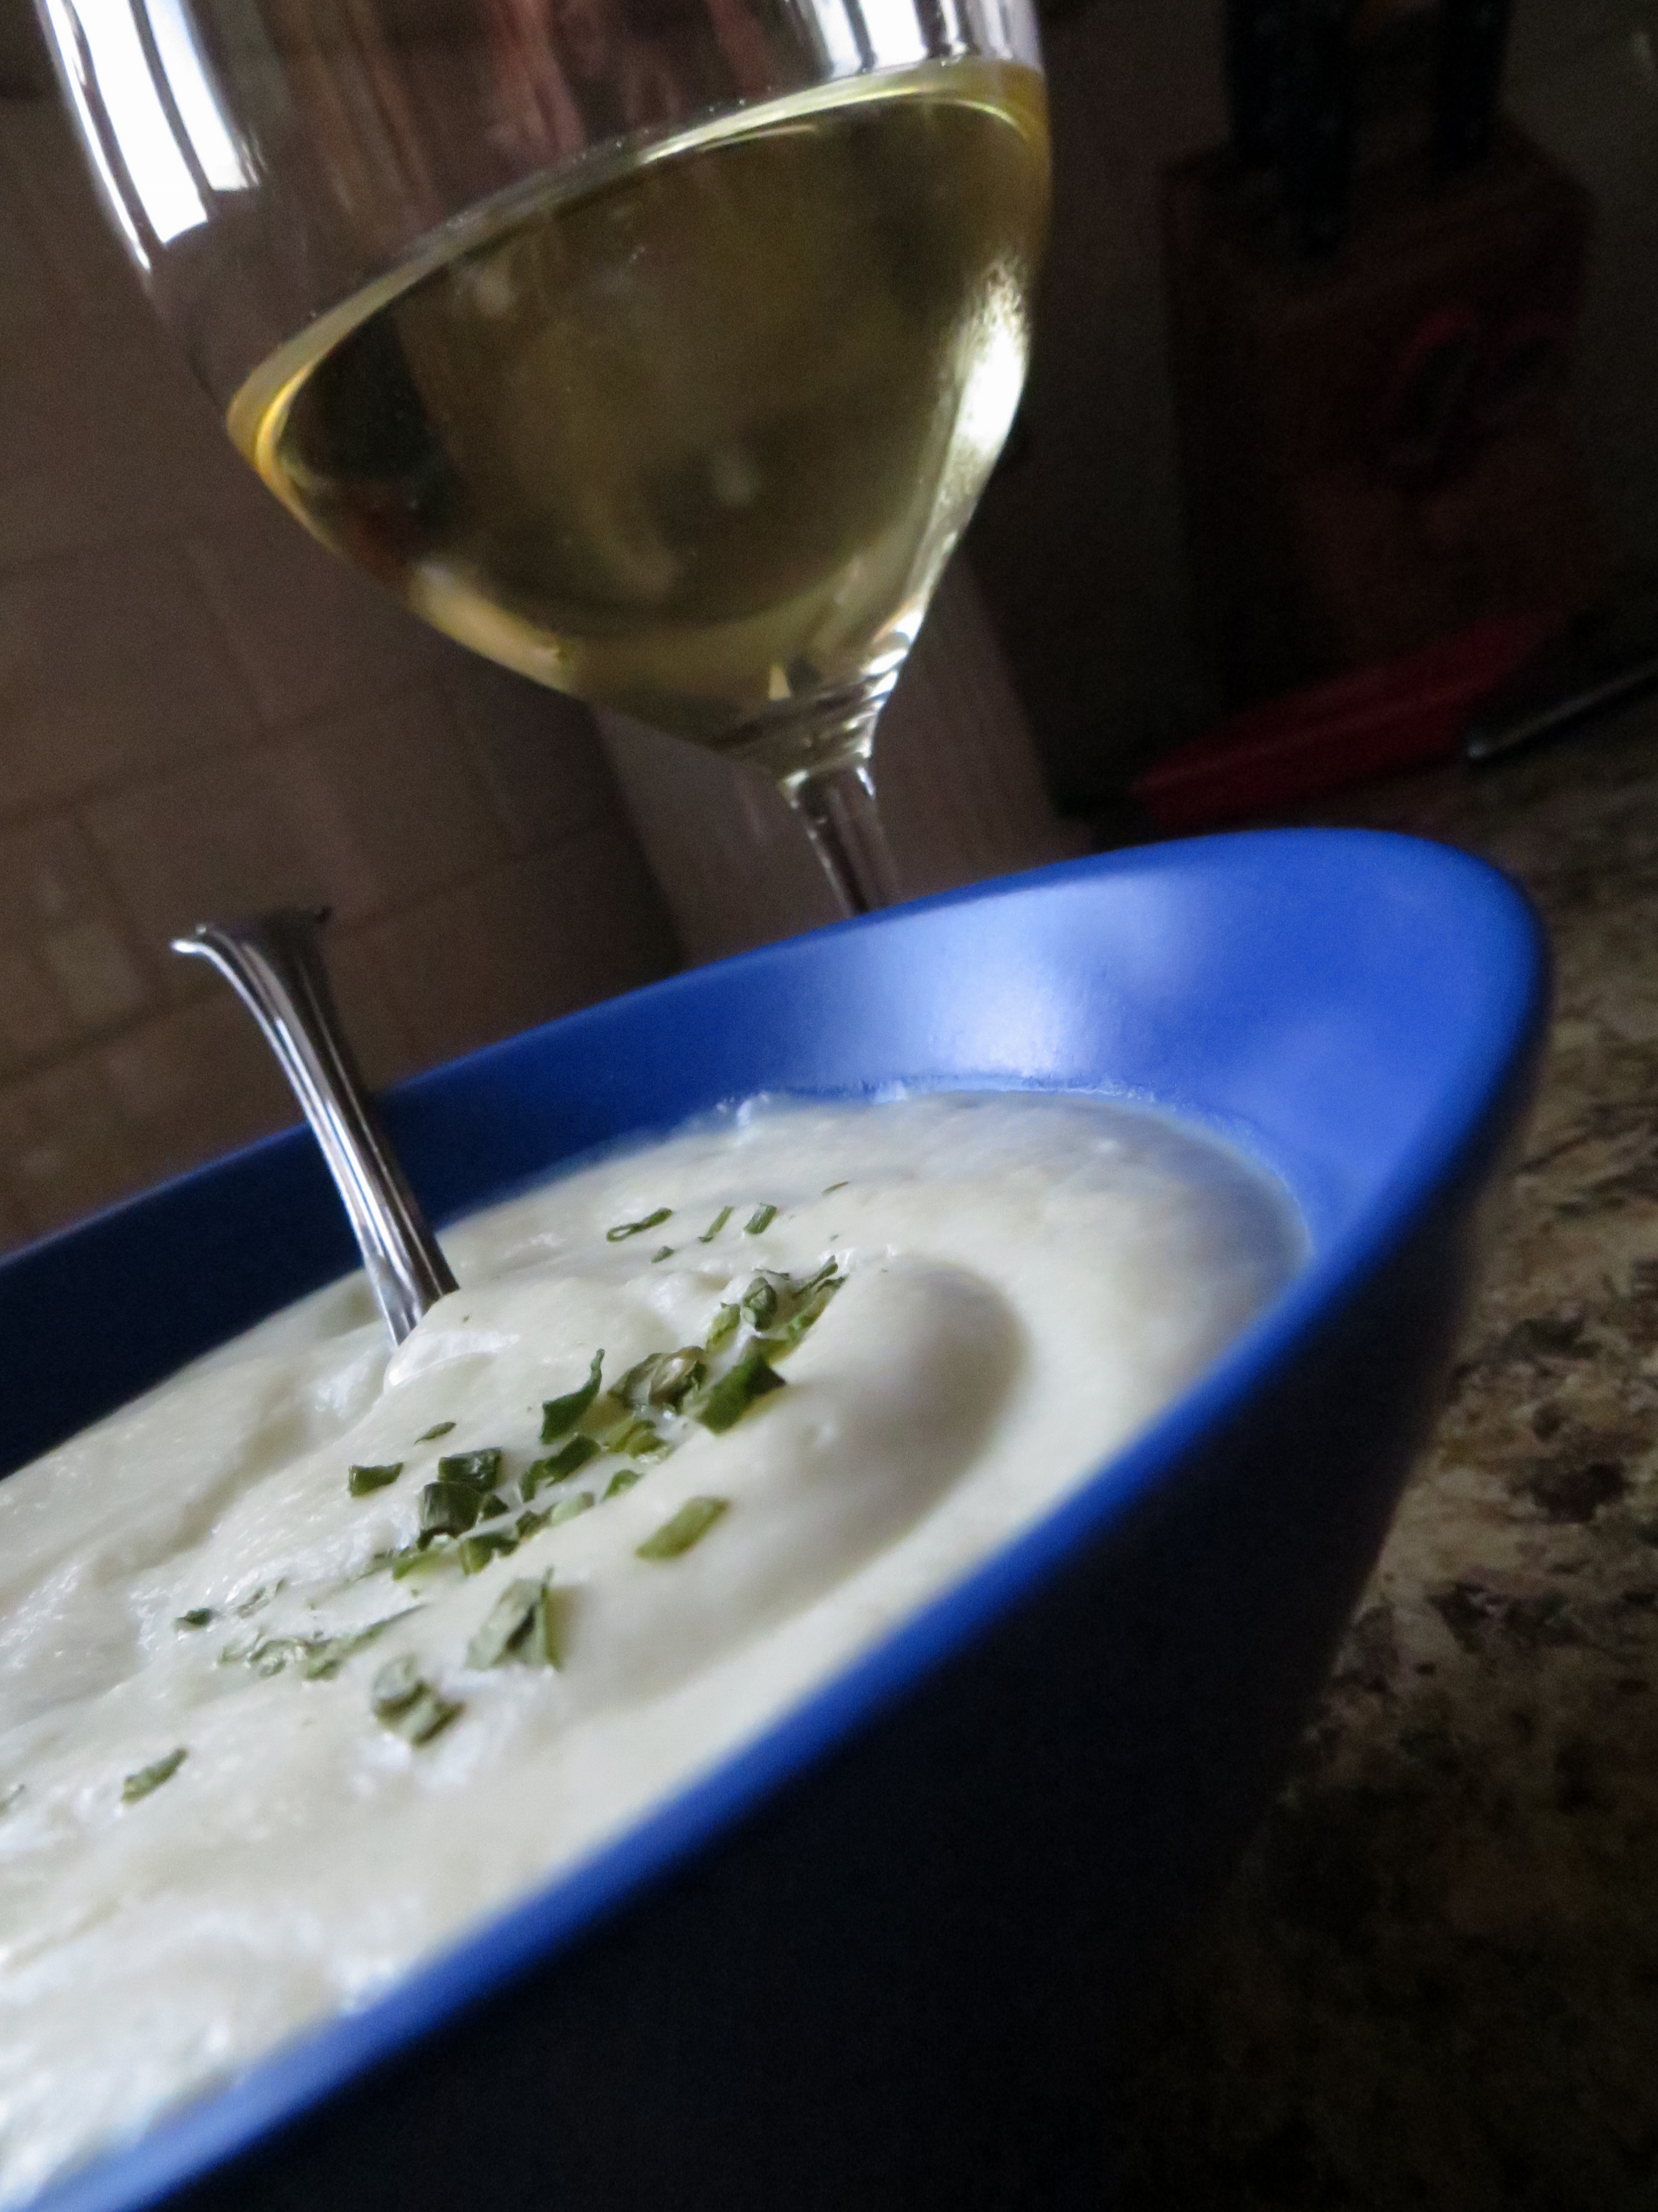
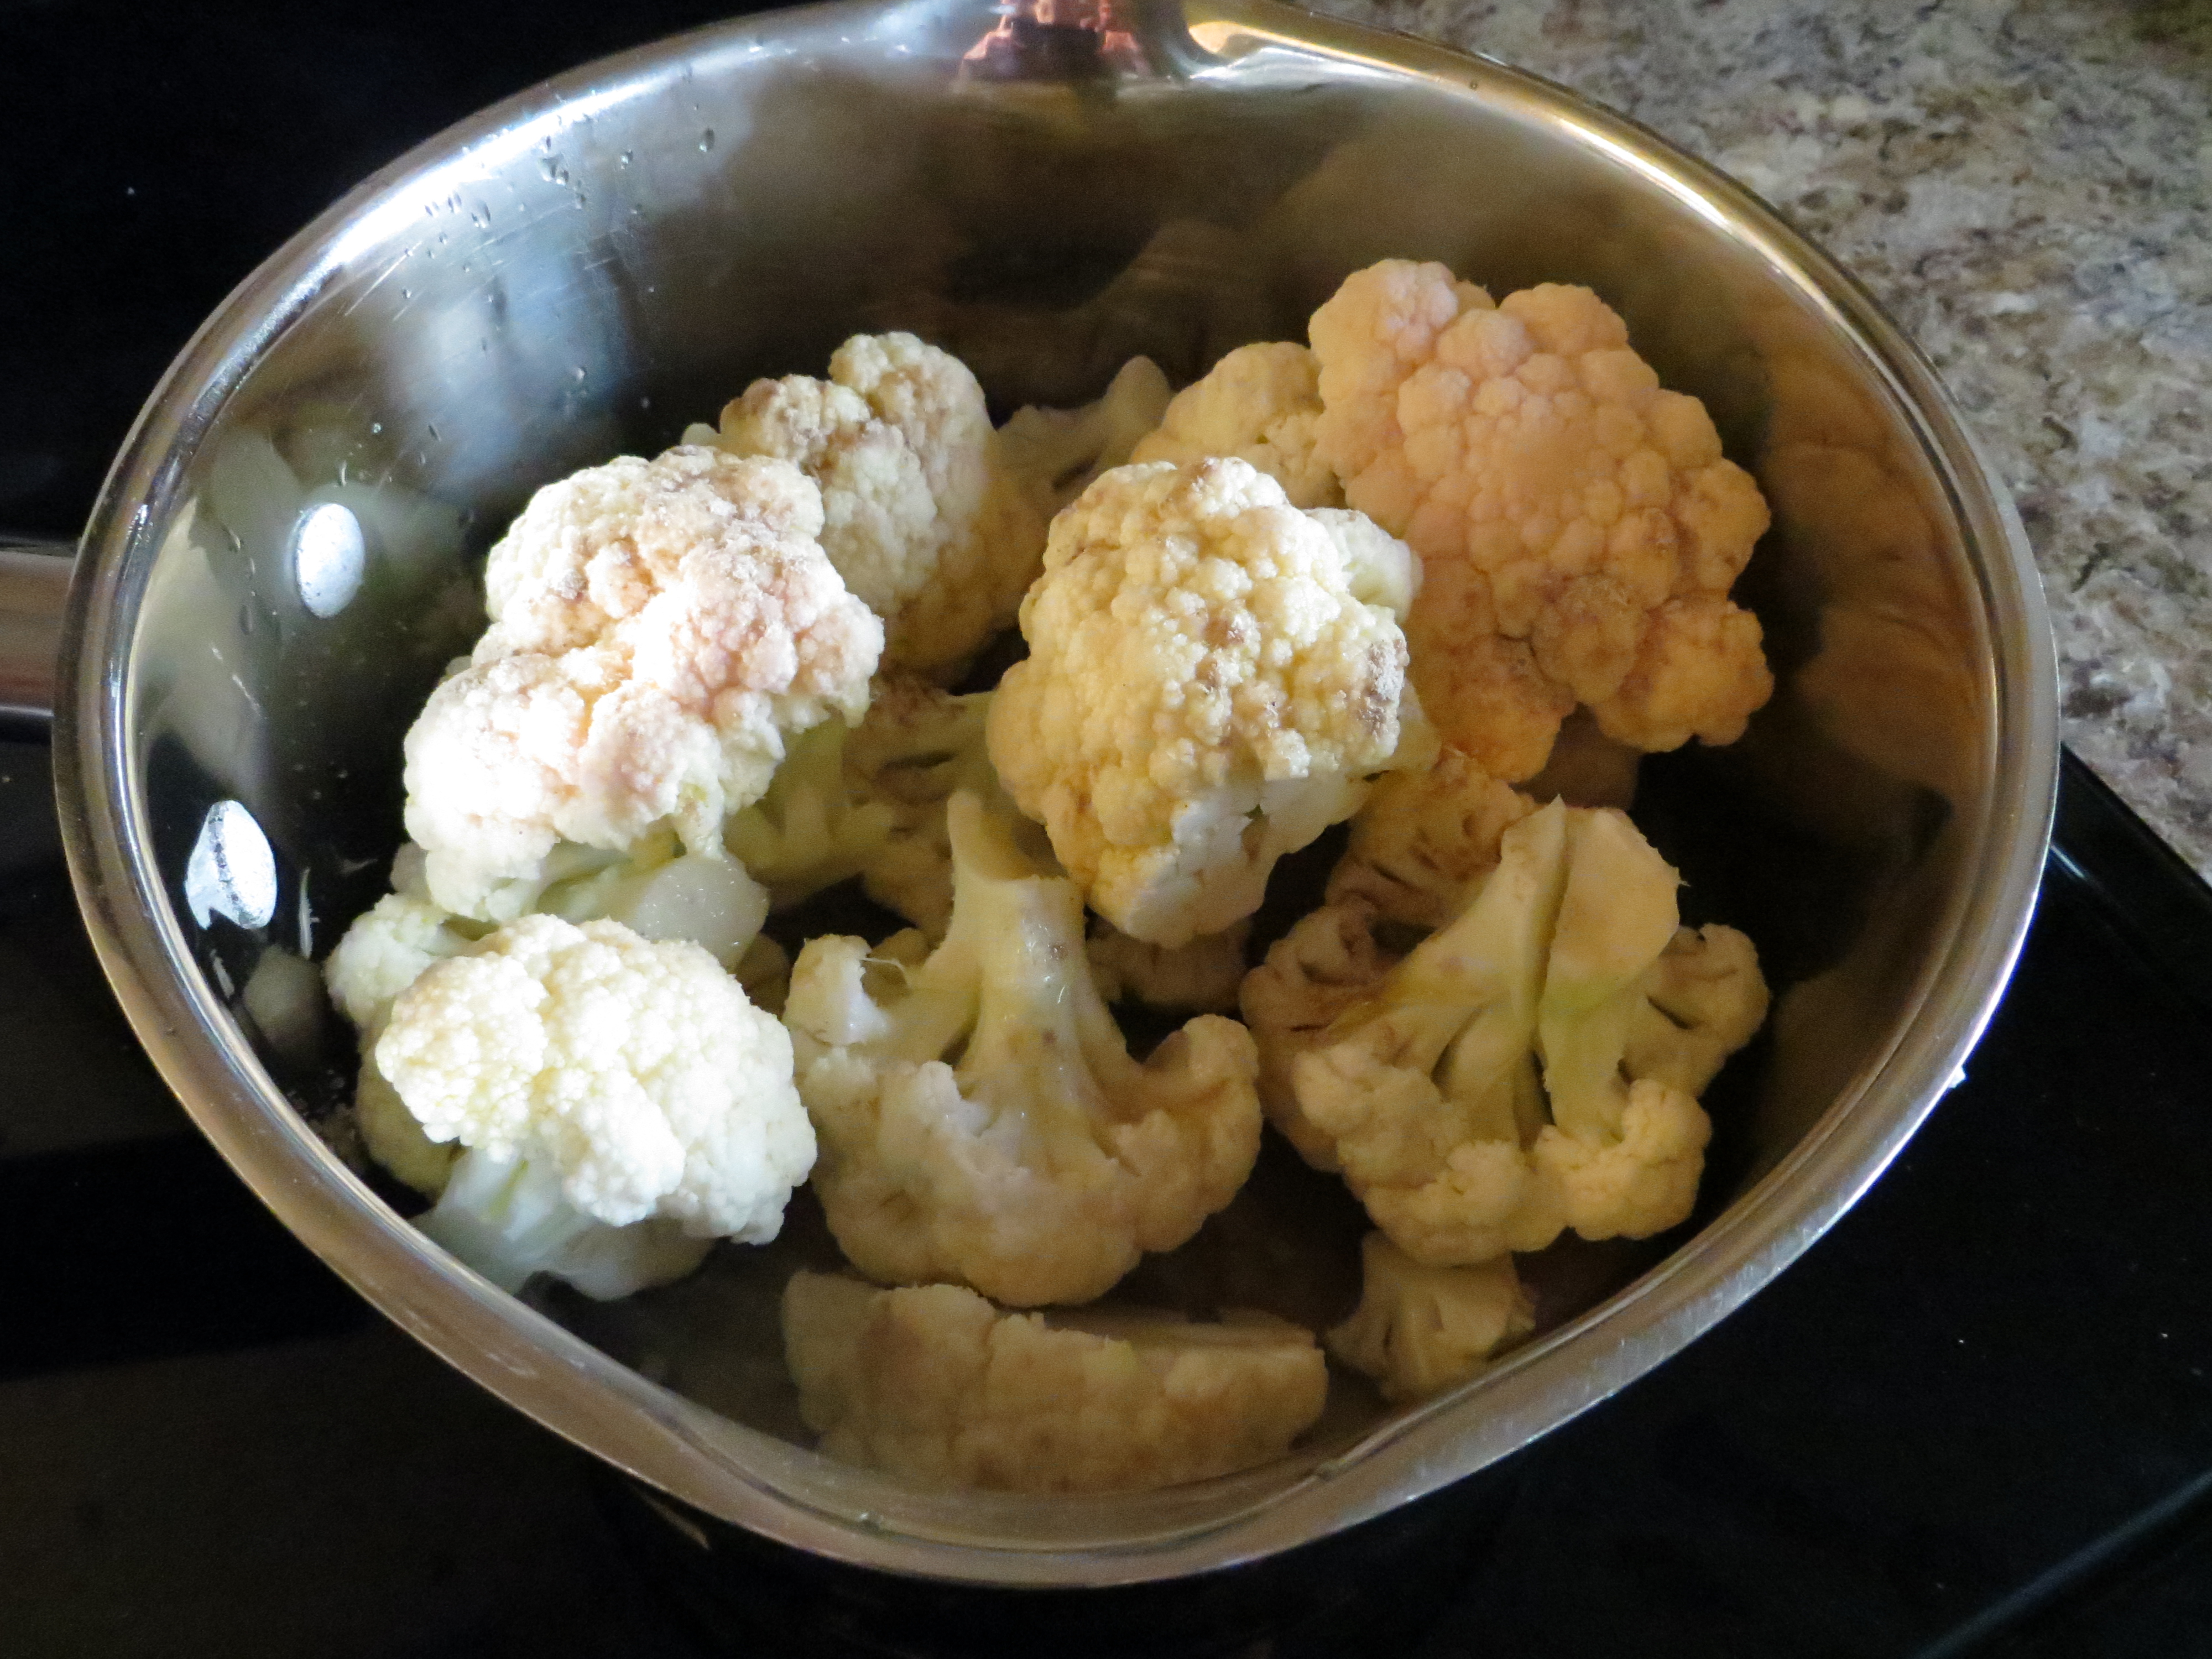
In a medium pot, heat olive oil to medium high heat. Add cauliflower, chicken broth and green onions. Sprinkle in white pepper, salt and garlic paste and stir ingredients. Boil ingredients for five minutes. Add fennel and continue to cook at medium heat for five minutes. Put all ingredients into a blender such as a
VitaMix and add 1/4 cup milk. Blend on variable speed for blended soup
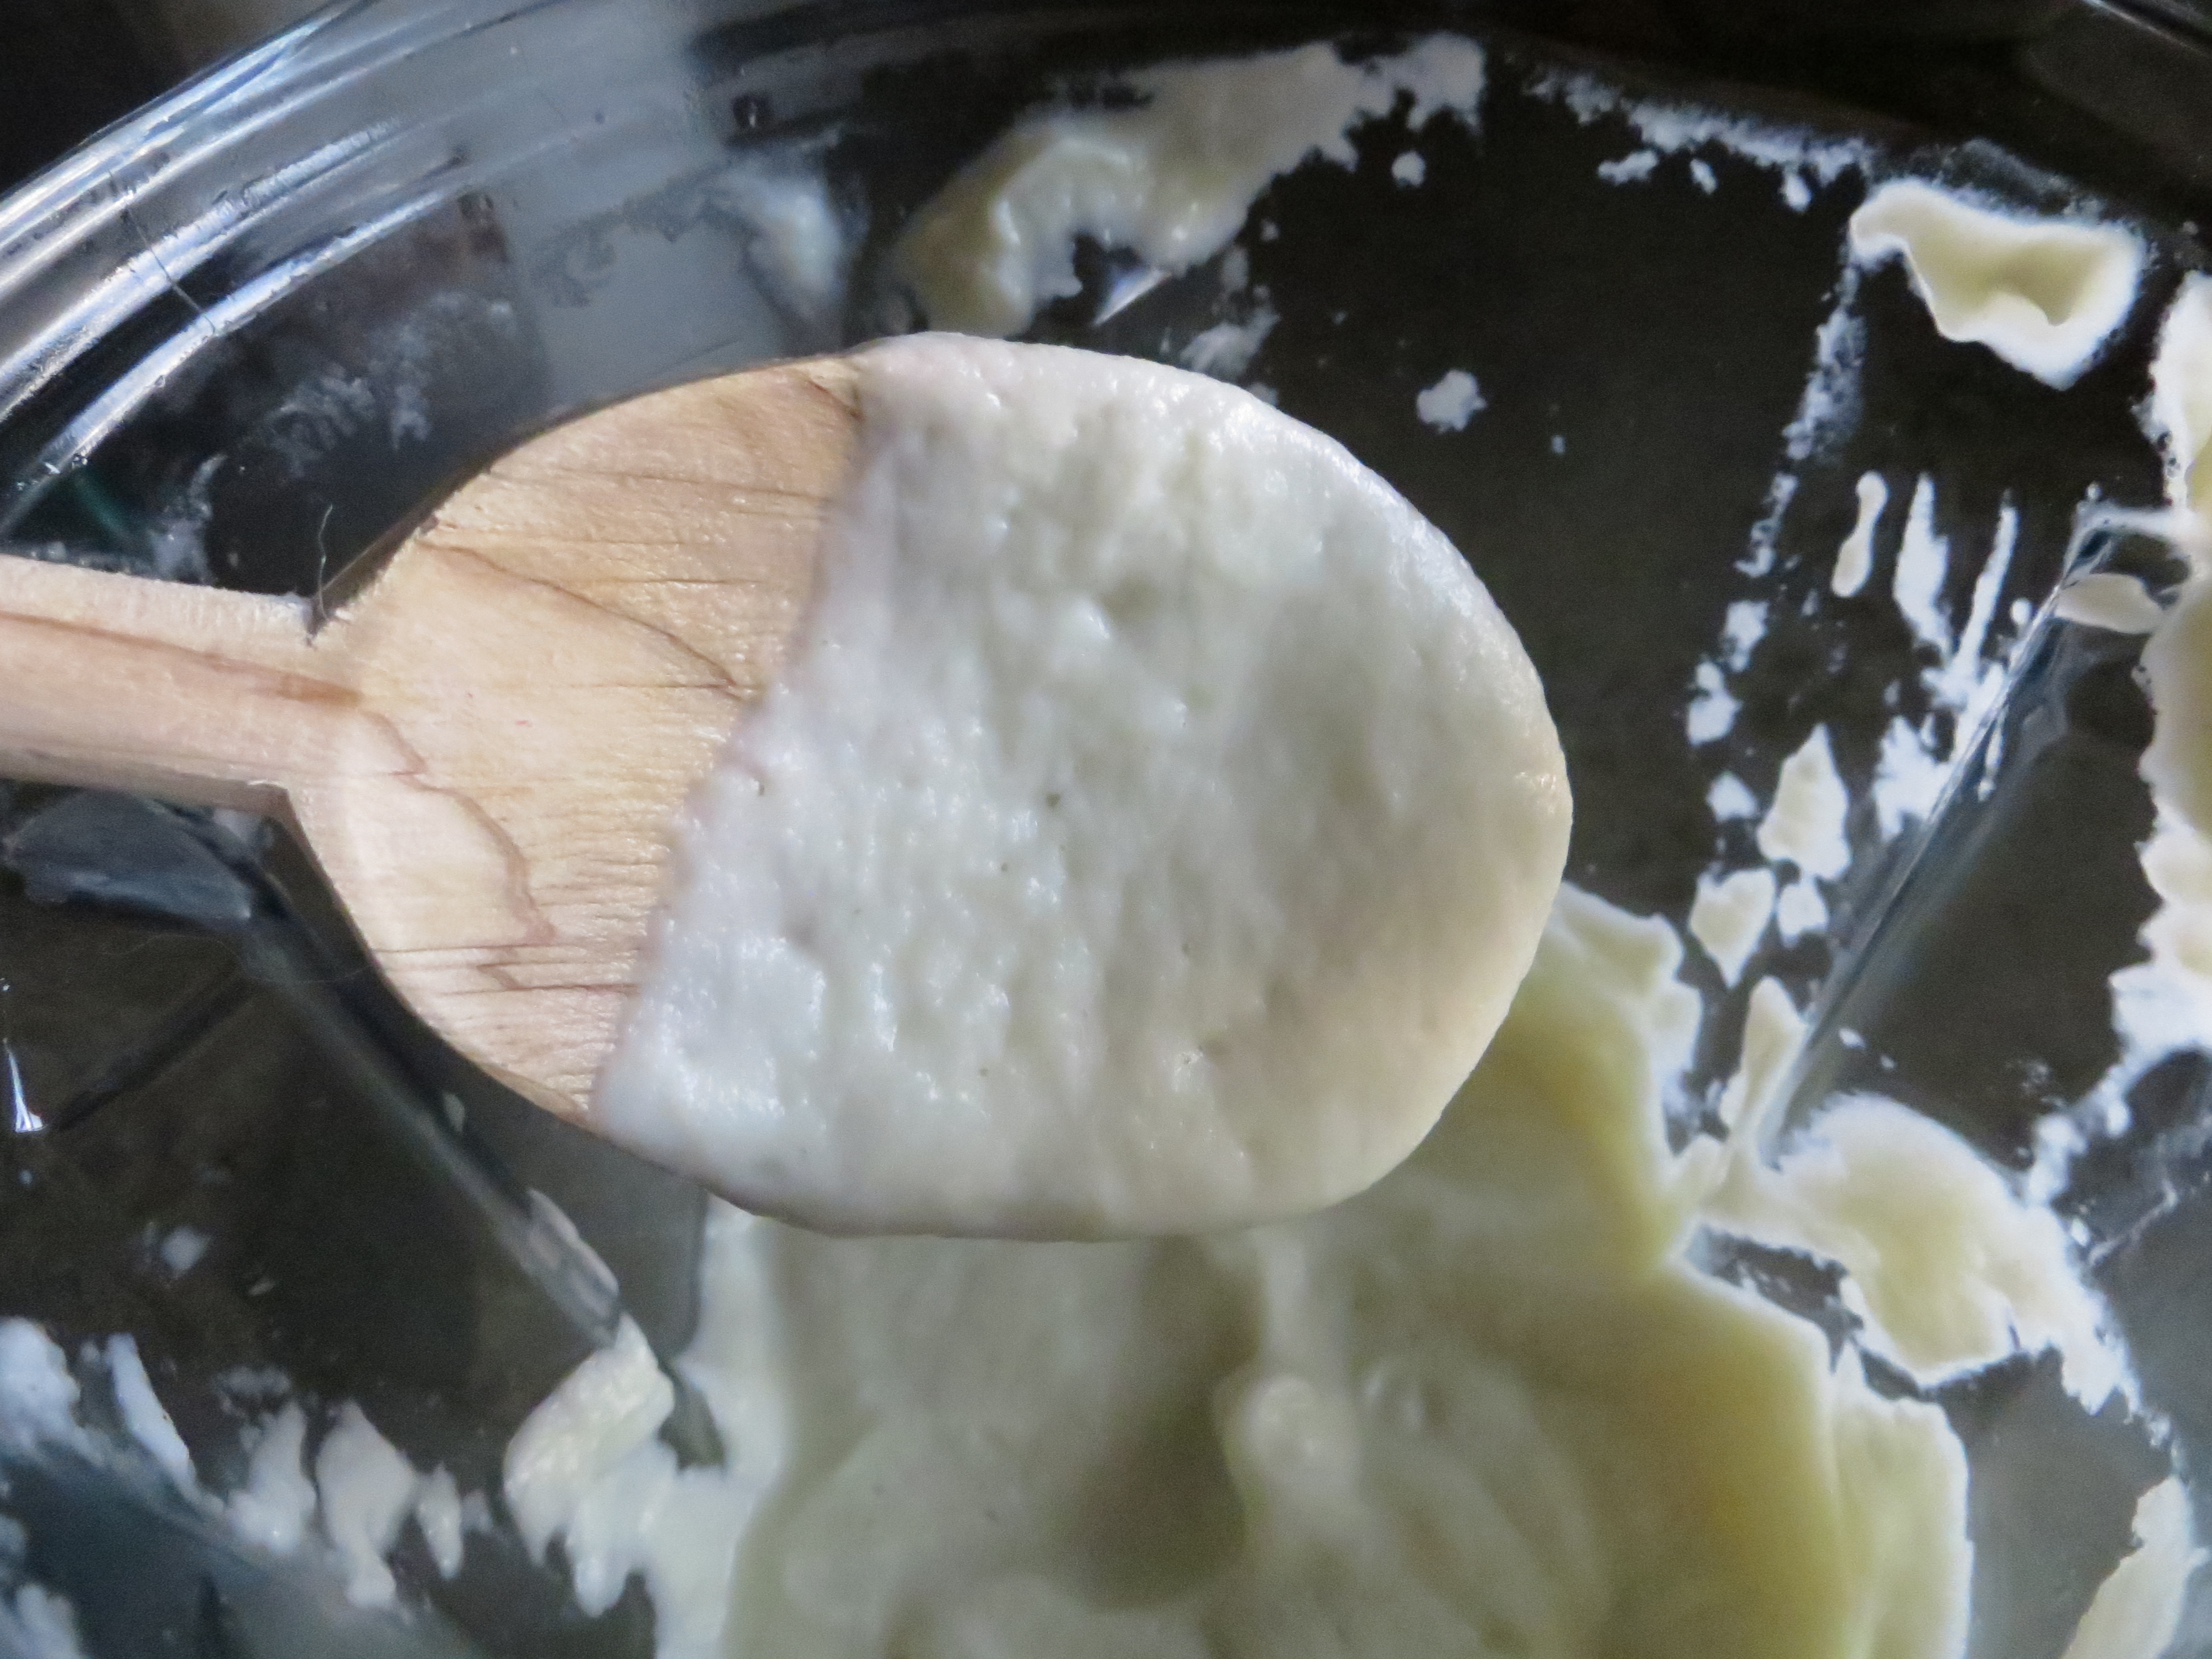
15 seconds and then on high for 15 seconds. If using a blender, mix ingredients until thick and whipped.  Serve in a bowl and sprinkle chives on top.

For vegetarian soup substitute water for the chick broth.

Cheers

Christine


Conquering my Fears by Grilling Cornish Game Hen

A Recipe for Breaking my Fear of Fowl

Challenge yourself by grilling Cornish game hen. You'll discover just how easy it is to cook. Photo by Christine Willmsen

Challenge yourself by grilling Cornish game hen. You’ll discover just how easy it is to cook. Photo by Christine Willmsen

Most of us have foods we hate or food phobias. My friend Shannon can’t stand olives, and Patty believes beets taste like dirt. Mine has not been a hate of fowl, just a fear of it – fear of getting sick by eating undercooked poultry. What are your food fears?

Childhood memories can taint our palate

Let’s step back about 35 years to me as a child. My family had the philosophy of we eat what we cook, no arguments. I would whine, fight and hide my shriveled peas and the over-cooked, fatty, cheap steak that tasted like rawhide.

This cornish hen is the perfect size for dinner and leftovers. Photo By Christine Willmsen

This Cornish hen is the perfect size for dinner and leftovers. Photo By Christine Willmsen

Summer in Iowa meant juicy tomatoes, corn on the cob and grilled lemon chicken. When served a chicken breast and a leg, I took a big bite and discovered veins, tendons, bones and very pink meat. I complained to my parents that the chicken was raw and that I would get sick. My parents had no compassion, saying I had to finish eating the chicken, including all the meat near the bones. I don’t recall if I ever got sick, but since then I’ve had a fear of plunging my teeth into a piece of fowl.

In fact for years I couldn’t eat any meat on a bone, fearing the meat was raw and I would get sick. No BBQ ribs and no chicken wings. Boyfriends would cut the meat off the bone for me, and other times I would order boneless poultry. I was unable to cook a full-size chicken, let alone pick it up with my bare hands and take a bite.

Cornish Game Hen for one or two people

Marinate the hen in olive oil, fig and lemon preserves and other ingredients. Photo by Christine Willmsen

Ingredients include the hen, olive oil, fig, parsley, bourbon, cloves and lemon preserves. Photo by Christine Willmsen

Now it’s time to break my food phobia by getting to know the bird on a raw level and making my own recipe.

I bought a Cornish game hen, a small bony fowl that’s a perfect dinner for one or two people. I cut it in half, right down the breastbone, flattening it a bit with my hands, hearing the bones crunch. I marinated the two halves in a combination of fig and lemon preserves, parsley, cloves and other spices.

I can finally say I broke my fear of cooking small fowl and eating it. But you still won’t catch me gnawing on chicken wings. I hope this helps you take risks with food.

Hot in the Kitchen: Grilled Lemon and Fig Hen


Marinated the two halves of the hen for two hours in a mix of oil, fig preserves, parsley, lemon juice and preserves and cloves. Photo By Christine Willmsen

Marinate the two halves of the hen for at least two hours. Photo By Christine Willmsen

Ingredients:

1 Cornish game hen

¼ cup olive oil, plus 1 tablespoon to season grill

For side vegetables, add a sweet potato and half onion to the grill while cooking the hen. Photo by Christine Willmsen

For side vegetables, add a sweet potato and half onion to the grill.

¼ cup fig preserves

¼ cup chopped parsley

3 tablespoons bourbon

2 tablespoons lemon juice

4 slices of preserved lemons chopped

½ teaspoons ground clove

½ teaspoon salt

½ teaspoon pepper

Cut the hen in half, rinse with water, pat dry and flatten with hand. Mix all the remaining ingredients together and then marinate the two halves for at least two hours. On a two-burner grill, heat to medium or 400 degrees and set the other burner on low. If using a charcoal grill, put coals on one side of the grill to create the same effect. Coat the grate with olive oil. Cook skin side down for 6 minutes on medium, then move it to the low temperature area of grill for 8 minutes. Flip the two pieces and cook on medium for 6 minutes and then 8 minutes on low. Total cooking time should be about 28 minutes. The internal temperature on the thigh should be 165 degrees and juices should be clear. Let the hen rest for several minutes before taking a bite.

Cheers to conquering our food fears

Christine

Sweet Superbowl Party Peanuts

Rose Candied Peanuts

Of course the Superbowl is about football, but let’s not forget the party food. Whether you are attending another person’s party or crashing on the couch to watch the game Sunday, you must make my addicting Rose Candied Peanuts.

With just four ingredients this is an easy, aromatic snack to make that can be nibbled on while the Seahawks beat the Broncos or added to your lunch bag. This healthy, sweet combination takes only a couple of minutes to make and is easy to transport to a party.

Sprinkling rose water on the peanuts gives them a sweet, floral aroma unlike anything you’ve smelled before.

A bottle of rose water can be purchased at most Asian food stores and other gourmet markets for $5-10. I used roasted peanuts, but try almonds too. The candied peanuts can be stored for about one week if they stay out of your hands that long.

Hot in the Kitchen

Ingredients

3/4 cup sugar

1/4 cup water

1 3/4 cup roasted peanuts or almonds

1 1/2 teaspoons rose water

Dissolve sugar in water and bring to boil in small saucepan. Combine the water, sugar and peanuts in a saute or frying pan. Cook on medium high heat, stirring often until the syrup evaporates. Sprinkle rose water on nuts, stir and let cool.

Cheers

Christine

Recipe for Kale and Leek Pancakes

Kale and leek pancakes make a perfect lunch or dinner. Photo by Christine Willmsen

Kale and leek pancakes make a perfect lunch or dinner. Photo by Christine Willmsen

Ways to cook Kale: pancakes

The tumeric topping on the kale pancakes adds depth. Photo by Christine Willmsen

The tumeric topping on the kale pancakes adds depth. Photo by Christine Willmsen

Kale is the IN food when it comes to cooking. So I created two recipes to urge you to buy a bunch of kale and try the bold, deep, green vegetable that most people set aside because it’s used mostly as a garnish. This recipe combines kale and leeks to create a pancake for brunch, lunch or dinner.

Another way to use the rest of your kale bunch is to make a breakfast kale smoothie that is full of Vitamin A, C and K. If you are adventuresome in the dirt, plant kale in your garden. It can grow in the Pacific Northwest during the fall and winter months and is also available at grocery stores. I used the kale and leeks from Oxbow Organic Farm, a 25-acre vegetable garden near Carnation that sells its produce at farmers markets, restaurants and to weekly subscribers.

Hot in the Kitchen – Kale and Leek Pancakes

Finely chop kale

Finely chop kale

Ingredients for Pancake:

1 cup finely chopped kale (dinosaur is best variety with center vein removed)

¼ cup chopped leeks

3 eggs

Combine ingredients for batter

Combine ingredients for batter

1 tablespoon water

½ teaspoon salt

½ teaspoon pepper

¼ cup shredded mozzarella cheese

¼ cup peanut oil

Tumeric adds flavor

Turmeric adds flavor

Topping:

1 tablespoon low-fat sour cream

1 tablespoon low-fat yogurt

1/8 teaspoon turmeric

Dash of salt

Fry two minutes per side

Fry two minutes per side

Mix kale, leeks, eggs, water, salt, pepper and cheese together in bowl. In a frying pan, heat peanut oil on medium high until pan is hot. Use a half cup measuring tool to gently drop the mixture into the oil. Cook for two minutes on medium high until brown, using a splatter guard if grease starts to jump. Flip and cook another two minutes. Place on paper towel and drop the rest of the batter into the pan and repeat. Mix sour cream, yogurt, turmeric and dash of salt together and add dollop to the top of the pancakes.

Cheers

Christine

Squid Ink Pasta with Scallops

Squid Ink Pasta Adds Color to this Recipe

Want to jazz up your pasta dinner with a little color? Try flavored or colored pasta like squid ink.  While the thought of squid for some people may make them say – yuck- I know many of you are daring enough to try it.

My video will show you just how easy it is to create this visually stimulating dish that combines squid ink pasta, scallops and fresh vegetables.

Frankly the best part of the squid ink pasta is the deep, rich black color. Cephalopods like squid release the dark liquid as a defense, and the liquid is extracted from the ink sacs of the squid when they are being harvested.

Black squid ink pasta is the perfect color contrast to the seared scallops. Photo by Christine Willmsen

Black squid ink pasta is the perfect color contrast to the seared scallops. Photo by Christine Willmsen

And for those who are scared of the flavor – fear not – squid ink pasta tastes very similar to wheat pasta with a subtle salty flavor. There typically is a small percentage of ink that’s added to the water and dough that creates the black color. Squid ink pasta and other types such as tomato, basil and spinach can be bought at gourmet grocery stores like Central Market for $9 and online at Marx Foods.

In my last video and blog post I showed you step-by-step how to sear scallops in a pan like a professional. Now that you know it’s simple to cook scallops, making this dish will be easy to do when you get home from work. A great wine to pair with this dinner is a glass of Spanish Albariño.

Hot in the Kitchen: Squid Ink Pasta with Seared Scallops

Boil squid ink pasta for eight minutes. Photo by Christine Willmsen

Boil squid ink pasta for eight minutes. Photo by Christine Willmsen

Ingredients:

1/4 bag of dry squid ink pasta

3 defrosted or fresh large scallops

2 tablespoons olive oil

3 gloves garlic minced

1/4 cup red pepper diced

3/4 cup cherry or small yellow tomatoes

2 tablespoons chopped basil

1 tablespoon chopped thyme and parsley (optional)

Salt and pepper to taste

Rinse scallops, pat them really dry with paper towel and lightly season with salt and pepper. Pour one tablespoon olive oil into pan that’s reached medium-high heat and add scallops. Don’t move or flip them. Cook for two to three minutes until brown. Flip and cook an additional two minutes. Remove scallops from pan and let them rest. Boil pasta in unsalted water for 8 minutes.

In the pan combine the remaining olive oil, garlic, red peppers, tomatoes, salt and pepper. Sauté for approximately six minutes on medium heat, then add basil, thyme and parsley and cook for an additional two minutes. Add scallops to the pan to warm them up. After draining the pasta, combine it with scallops and sauce.

Cheers

Christine

How to Cook Scallops

Learn how to Sear Sea Scallops like a Pro

Scallops are the prefect food for singles. They are fast and easy to cook and very healthy. But often my friends say they are intimidated by trying to cook these pearly white discs of sweet, deliciousness, often getting mixed results. The best way to cook scallops, especially if you have a busy schedule is pan-searing them over hot heat with some simple flavors. When seared correctly, scallops are creamy, sweet and carmelized on the outside.

I prefer the large scallops, which are usually available in most grocery stores. The added benefit is that these mollusks are what I like to call “power foods” because they are made up of at least 50 percent protein, low-calorie and loaded with magnesium and potassium.

Pat dry scallops, season and sear for 2 minutes per side. Photo by Christine Willmsen

Pat dry scallops, season and sear for 2 minutes per side. Photo by Christine Willmsen

You will not only impress yourself but any date or friends you are entertaining. Add the scallops to pasta, rice or sautéed vegetables.

In my next video I’ll show you a recipe and how to cook Squid Ink Pasta with Seared Scallops to truly take advantage of this healthy and easy seafood.

Cheers

Christine

Corn and Salmon Salad Recipe and Grilling Tips

A winning combination of ingredients for this chopped salad is salmon, corn and cherry tomatoes. Photo by Christine Willmsen

A winning combination of ingredients for this chopped salad is salmon, corn and cherry tomatoes. Photo by Christine Willmsen


Seattle’s smoked salmon, grilled corn and fresh garden ingredients make this salad a full dinner

It’s sweet corn time. As a girl who grew up in Iowa, we always bought sweet corn from a pickup truck on the side of the road after the farmers had picked the corn that morning. So it’s only natural that I find myself buying numerous ears of corn in July and wanting to create different recipes in addition to just putting them on the grill.

I’ll never forget a surprise gift from my dad several years ago when he was visiting Seattle. When he arrived he opened an extra piece of luggage and about two dozen corn picked that day from an Iowa farm spilled out of the bag. My heart was warmed by my dad’s sincerity and we ate plump, juicy corn for days. With sweet corn being grown throughout the U.S., almost anyone can get fresh corn from their farmers market or produce store.

Quick grilling tips for corn

Pull back husks of corn and remove any hairs, then season with salt, cumin and chili powder. Photo by Christine Willmsen

Pull back husks of corn and remove any hairs, then season with salt, cumin and chili powder. Photo by Christine Willmsen

Grill corn for 8-10 minutes in the husks to keep them moist. Photo by Christine Willmsen

Grill corn for 8-10 minutes in the husks to keep them moist. Photo by Christine Willmsen

To successfully grill corn, prep and season it. That means you need to pull the husks back, remove all the silk (fine hairs) and spice it up by rubbing a mixture of salt, chili powder and cumin.

Try your own spice combination. Rewrap the husks around the corn and grill for 8-10 minutes on medium-high heat. I always poke the corn with my fingernail and if it pierces the soft kernel and the juices explode then it’s time to pull it from the grill.

While I may eat an ear or two for dinner, I’ll grill another one so that I can use it for a salad the next day. I’ve created this recipe that combines Seattle’s finest smoked or cooked salmon with garden ingredients that are ripe right now including arugula and cherry tomatoes. This is a hearty salad that’s perfect for one person for dinner. To see The Solo Cook assemble the salad, watch King 5’s New Day Northwest show. The recipe below is inspired by the restaurant Cowboy Ciao in Scottsdale, Arizona, where I had a memorable salad. I know once you try my salad you will be hooked on cooking extra ears of corn for this chopped salad.

Hot in the Kitchen: Corn and Salmon Salad Recipe

Cut all your ingredients and line them up to place them in a line on your plate, then drizzle dressing on top. Photo by Christine Willmsen

Cut all your ingredients and line them up to place them on your plate, then drizzle dressing on top. Photo by Christine Willmsen

Ingredients:

1/2 cup of corn or kernels from 1 grilled corn cob

1/2 cup chopped arugula

1/4 cup diced cherry tomatoes

1/4 cup chopped smoked salmon or cooked salmon

1/8 cup slivers asiago cheese

3 tablespoons pepitas

1/4 cup cooked pearl or Israeli couscous

Pesto Buttermilk Dressing:

Gently stir dressing in with the salad ingredients. Photo by Christine Willmsen

Gently stir pesto buttermilk dressing in with the salad ingredients. Photo by Christine Willmsen

1/4 cup mayonnaise

1/4 cup pesto (store bought if easier)

Half of shallot chopped

1/2 cup buttermilk

1/3 lemon squeezed for juice

Salt and pepper to taste

Combine mayonnaise, pesto, shallots and 1 tablespoon of lemon juice into food processor and blend thoroughly.  As food processor continues to run, add buttermilk, remaining lemon juice and salt and pepper. Refrigerate until ready to use.

To prepare salad for presentation: place each ingredient in a line such as 1/4 cup arugula, 1/4 cup corn, tomatoes, asiago, salmon, pepitas, couscous, 1/4 cup corn and 1/4 cup arugula. Drizzle dressing on top of the ingredients. When ready to serve, lightly fold dressing into the ingredients. Leftover dressing can be stored for several days. Use the remaining dressing as a dip for fresh cut vegetables.

Cheers

Christine

Two Beet Salad Recipes that are Quick and Healthy

Try these two quick and healthy beet salads; each is a perfect serving for one

Roasted beets can taste like candy when added to salads. Photo by Christine Willmsen

Roasted beets can taste like candy when added to salads. Photo by Christine Willmsen

It’s time to go beyond the traditional roasted beets your mom boiled or cooked in the oven and think of beets as a way to beef up your salads.

Go to the store and get two or three beets and start by cleaning them and trimming the green tops off.  Leave about one inch of the stems intact to prevent the beets from bleeding. But don’t throw away those green tops; use them in my chicken soup recipe I posted last week. Beets are superfoods, stocked with high levels of folate and potassium, according to Self Nutritional Data and the USDA.

I often cook several beets on a Sunday night so that I have them ready for these salads throughout the week. Preheat your oven to 425 degrees. Then rub each beet with a bit of olive oil and wrap them in aluminum foil.  Place them on a cooking sheet so that their juices won’t ooze to the bottom of the oven and make a mess. Cook them for at least one hour or until a knife can easily slide through the beet. Cool them to room temperature and peel them.

Now let’s have fun with two different salads that I promise will make your beets taste like candy from the earth. The first salad combines the sweetness of beets, the crunch of cucumbers and the salt of feta cheese to make this a savory and sweet salad. The second salad is all about combining fresh, simple ingredients. Each of these recipes is a perfect serving for one person for lunch or a side dish at dinner.

Hot in the Kitchen: Beet, Cucumber and Pea Salad with Feta

The sweetness of the beets, the crunch of cucumbers and the salt of feta cheese make this a great salad. Photo by Christine Willmsen

The sweetness of the beets, the crunch of cucumbers and the salt of feta cheese make this a great salad. Photo by Christine Willmsen

Ingredients:

1 cooked beet cut into squares

½ cucumber peeled and sliced

¼ cup peas defrosted

1/8 cup crumbled feta cheese

½ teaspoon finely chopped fresh thyme

Olive Oil

Salt and pepper

Combine all ingredients in a bowl and lightly drizzle with olive oil. Salt and pepper to your taste. I used peas from my garden that I froze earlier in the year.

Hot in the Kitchen: Beet, Tomato and Avocado Salad

Beet, tomato and avocado salad only takes minutes to prepare. Photo by Christine Willmsen

Beet, tomato and avocado salad only takes minutes to prepare. Photo by Christine Willmsen

Ingredients:

1 cooked beet, sliced

5 cherry or teardrop yellow tomatoes sliced in half

½ avocado cut into thin slices

1 tablespoon olive oil

Sea salt to taste

Gently mix ingredients together and sprinkle with sea salt.  If you are craving greens in your salad, add ½ cup torn arugula.

Cheers

Christine

Easy Chicken Soup with a Leafy Twist Recipe

Try Chicken Soup with Beet Greens to Stay Warm on Frosty Days

On cold days, there’s nothing better than a large, hot bowl of chicken soup to thaw your bones and steam your face. I have a great twist on chicken soup that helps you use left over chicken and the tops of beets. Instead of cranking open a lackluster can of chicken soup or spending hours cooking a pot of soup on the stove, just follow these easy steps to make a flavorful chicken soup that will leave you satisfied.

This is a easy and fast soup to make with chicken, beet greens and garbanzo beans. Photo by Christine Willmsen

This is an easy and fast soup to make with chicken, beet greens and garbanzo beans. Photo by Christine Willmsen

As a single person I often have leftover chicken from another meal that I want to use in another dish, and this soup makes use of all those extras in the kitchen. The twist in this soup is adding beet leaves. And when I pulled some of my beets out of the garden recently, I knew I wanted to some how create a recipe that used those colorful green and red tops.

Many people buy their beets, cut off the tops, and roast the red jewels in the oven. But don’t dump the leafy tops in the compost.  They contain valuable nutrients and are perfect for this chicken soup. If you don’t have beet tops, you can use rainbow chard or spinach as a substitute. This soup will make enough for dinner and then lunch the next day. With chicken and garbanzo beans this is a protein-packed soup that’s filling despite it not having noodles or dumplings.

Hot In The Kitchen: Chicken Soup with a Leafy Twist

Don't throw away the tops of beets. I use been greens from my garden to add flavor to soups. Photo by Christine Willmsen

Don’t throw away the tops of beets. I use beet greens from my garden to add flavor to soups. Photo by Christine Willmsen

Ingredients:

1 chicken breast cut in large chunks or ¼ of chicken that’s leftover

½ onion chopped

2 cans vegetable or chicken stock

1 tomato chopped

1 can garbanzo beans

2 cups beet greens, thickly sliced, without the thick stems

3 tablespoons of minced cilantro

1 teaspoon of both salt and pepper

Optional: slices of avocado, lime slice and hot sauce

Cook chicken and onion in saucepan with stock, salt and pepper on medium low heat until tender or falling off the bones, about 30 minutes.  Then add tomato, garbanzo beans and beet greens to soup and cook on low for another 8-10 minutes. Top the soup with cilantro, sprinkles of sea salt and slices of avocado. If available squeeze a slice of lime on top to give the soup a bright flavor. If you like a little heat, feel free to add a couple drops of hot sauce.

For other great chicken soups recipes see Foodista’s recent story.

Cheers

Christine

A live cooking competition at a Seattle restaurant – an opportunity I can’t pass up

This home cook is ready to play at Kitchen Circus

When I heard the news that I made it as a contestant for Kitchen Circus, a live cooking competition at the renowned Rover’s restaurant in Seattle, I jumped up and down with excitement like a little girl. Then I got nervous.

If you ask my friends what I’m passionate about they will tell you food and journalism. While being a hard-news reporter almost pays the bills, food fills my heart. I’m always chatting about food, creating new recipes, reading about food and, of course, eating it any chance I can get. That’s also part of the reason why I started this blog The Solo Cook.

So when I heard about the Kitchen Circus contest, I thought why not take it to the next level – right?

Why not challenge myself by stepping into a professional kitchen and cooking an incredible dish live and on camera – oh and for 45 people. So with nudges and encouragement from my friends, I submitted an application and a home video that talks about myself and shows me cooking an Italian fish dish.

Live Audition Nerves

To my surprise I made the first cut. But then I faced a live audition filmed at the restaurant, and I had no idea what to expect. Occasionally, I appear on local and national television stations, speaking about investigative stories I’ve written, but being on camera for this was different. I wondered what Chef Thierry Rautureau was going to ask me and how he would test me.

At the live audition, Chef Thierry Rautureau asked me questions about why I should compete in Kitchen Circus.

At the live audition, I met other potential contestants who equally loved cooking and I felt more at ease. As the camera rolled, the affable Rautureau peppered me with hard questions. On top of that – at the same time – I also had to separate an egg’s yolk and white, and later mince a shallot. I honestly don’t recall how I answered some of the questions. But soon the camera seemed to fade and there I was just chopping and chatting with Rautureau.

I must have impressed the chef and the crew because now I’m one of nine contestants who are up for the ultimate challenge. I will cook an appetizer, main entrée or dessert for at least 45 people; competing against two other home cooks during a Nov. 20 dinner at Rover’s. You can count on me channeling my competitive and creative streaks that night. Until then I will be obsessed with food and sharing that journey.

Cheers

Christine